Preset campaigns
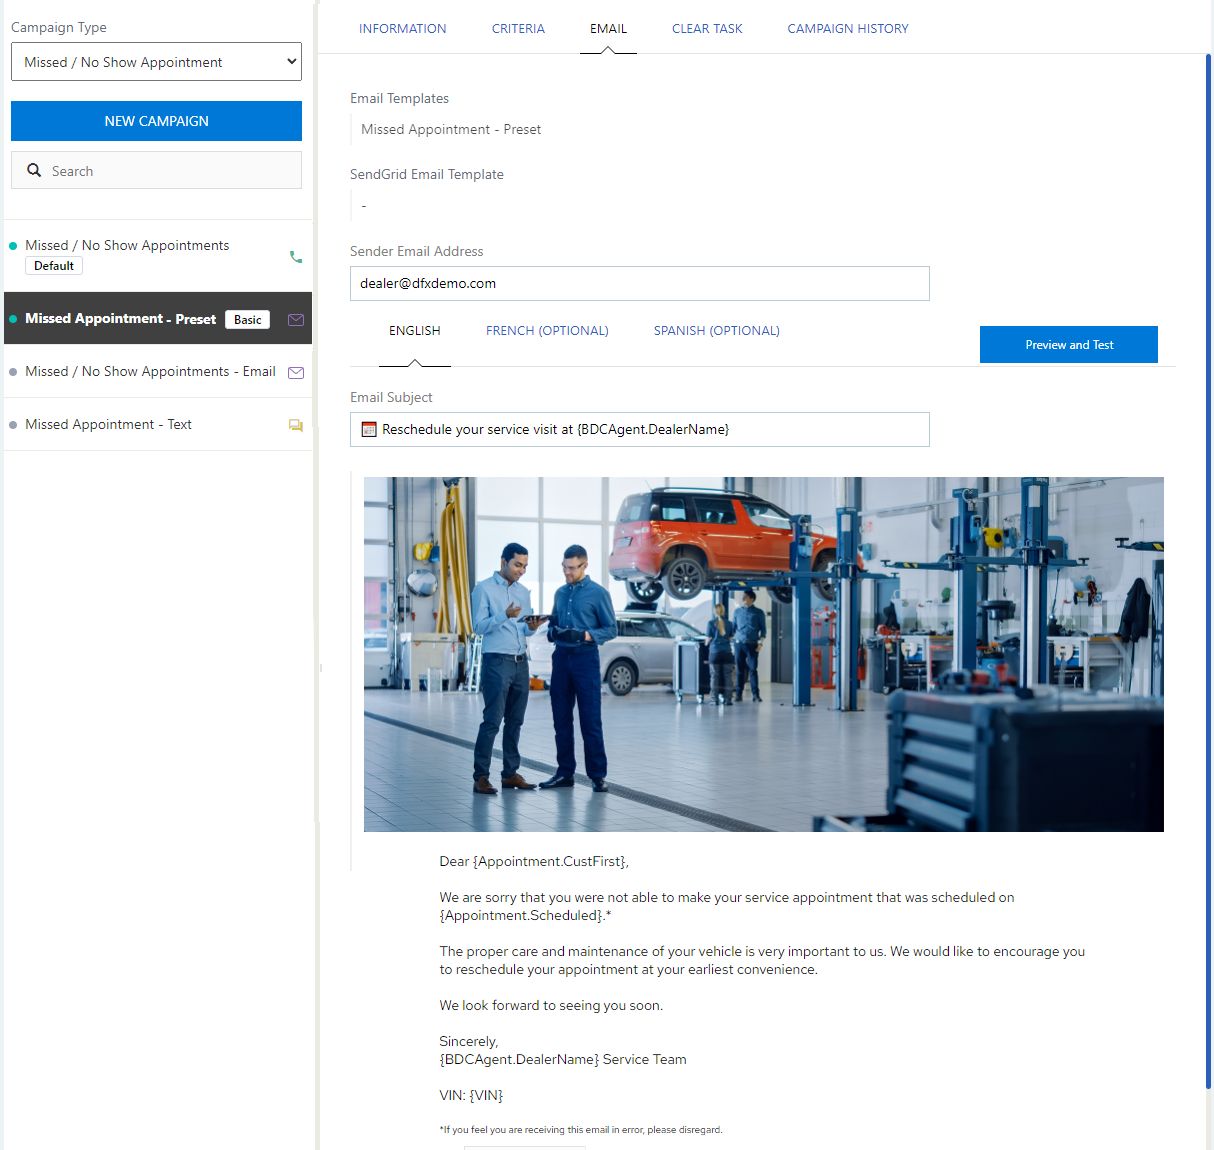
Each preset campaign comes with pre-configured settings including campaign name and frequency plus generic (unbranded) email graphics and script. The settings have been chosen to be the most commonly used and effective for the campaign type making it quick and easy for the average
NOTES:
-
‘Preset’ indicates that the campaign settings are pre-configured and most cannot be changed.
-
Preset campaigns are disabled by default.
-
Preset campaigns cannot be copied.
Basic package
The following preset email campaigns are in the 'Basic' package and are available to all
| Campaign Name | Campaign Type |
|---|---|
| Appointment Confirmation - Preset (Email) | Appointment Confirmation |
| Missed Appointment - Preset (Email) | Missed / No Show Appointment |
| Service Reminder - Preset (Email) | Overdue for Service |
| Service Thank You - Preset (Email) | Service Type |
| 5 Steps Email - Preset (Email) | Service Type |
Activating a Preset Campaign
-
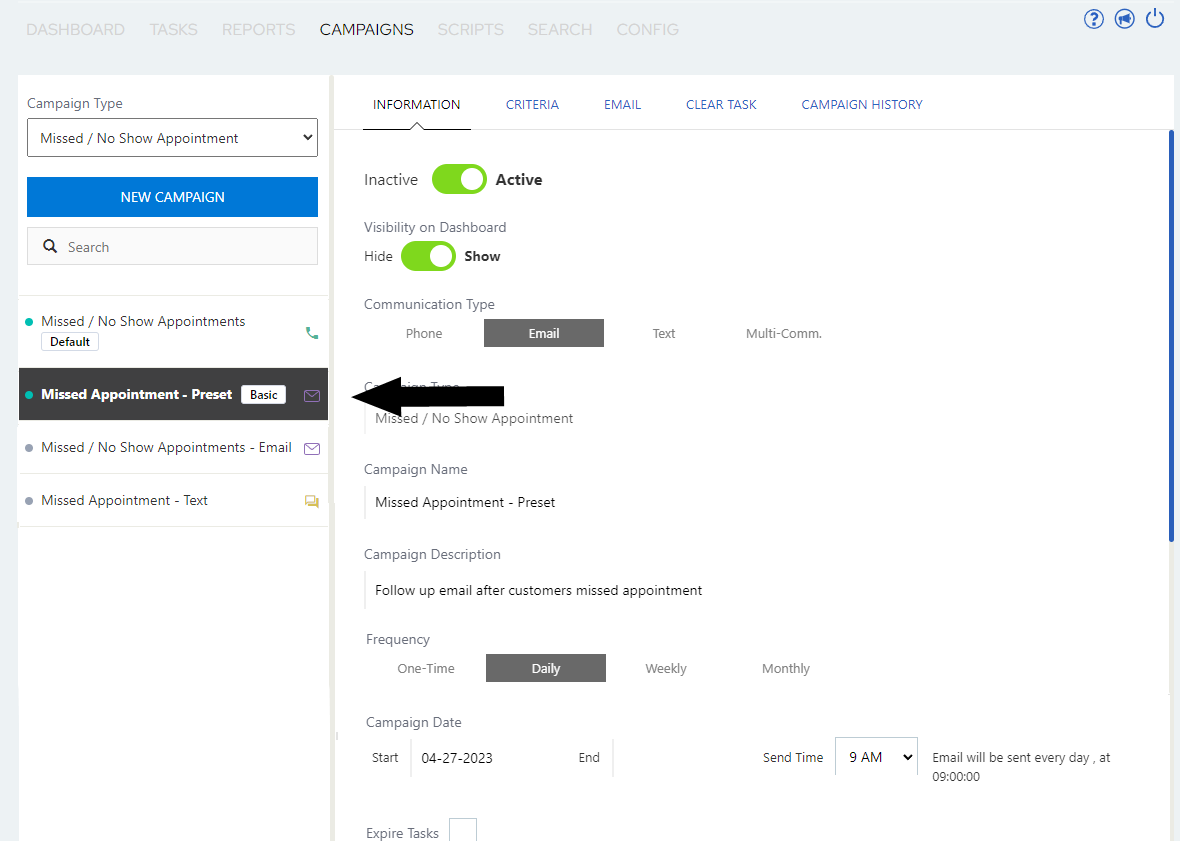
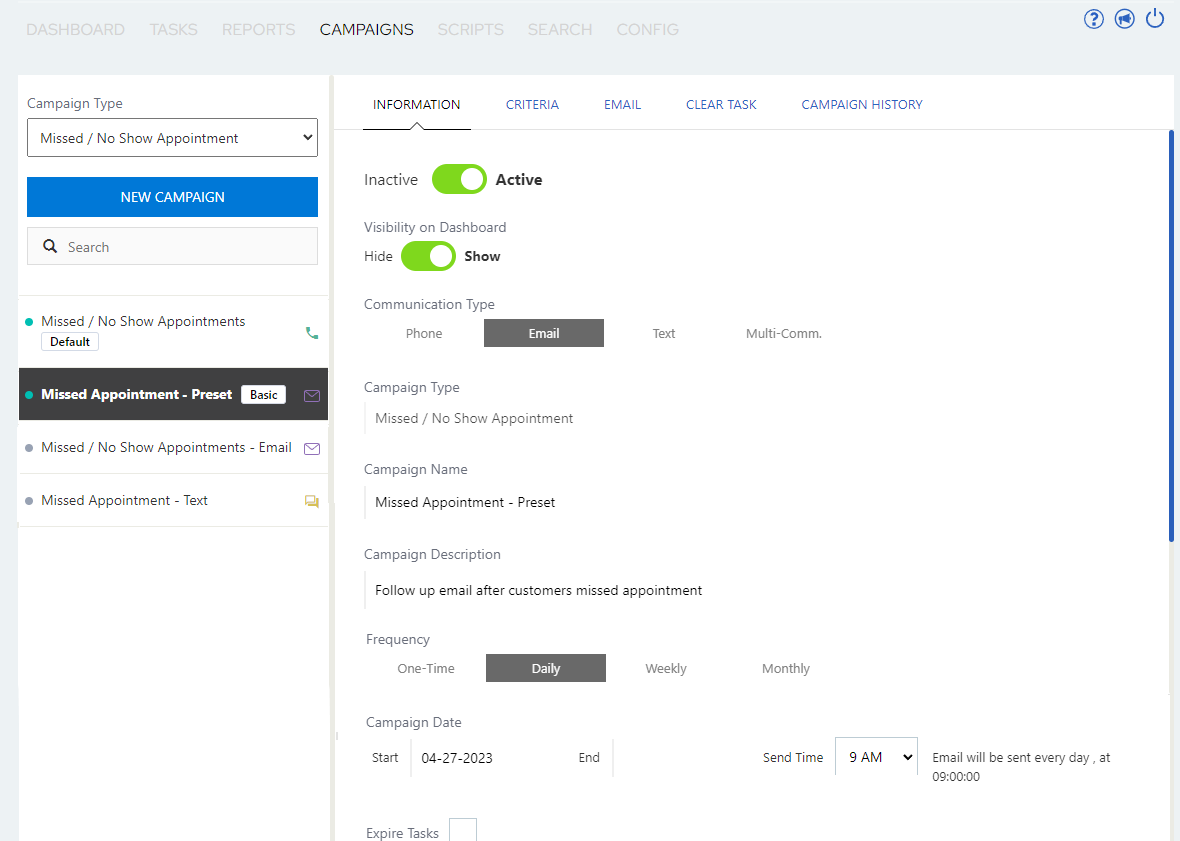
Before activating a preset campaign, review and understand how it works: when it will be sent, how often it will run (frequency), date range criteria, and what the email includes. None of these particular settings can be modified.
-
Set the campaign to Active. Adjust the Hide/Show toggle as preferred.
-
Review and adjust the following settings as needed:
-
Campaign Date: Start, End and Send Time
-
Sender Email Address - defaults to the first available of Main department email from AM Admin, Main department email from the Dealer Profile, or noreply@dealer-fx.com (do not leave as noreply@dealer-fx.com)
-
Email Subject
-